When I was in Australia last year , I promised various people the instructions on how to make a handbag that I had with me, made out of an old law textbook.
So, belatedly (but it did take ages to make/photo/write up at the same time), here’s the details of how to make a book bag for yourself!
Materials
Empty hardback book shell, in good condition
Material – 1 large piece, or 2 contrasting/complementing smaller pieces (fat quarter size)
Craft felt – any colour
Magnetic clasps
Handbag handles
Ribbon to co-ordinate or contrast with the selected material (up to 1cm wide)
Tools/equipment
Scissors
Ruler
Tweezers
Wire snips
A4 Card
Craft knife
Cutting mat
Pen that will write on fabric (make sure it won’t bleed through the fabric though)
Glue gun
Iron and ironing board
Sewing machine (or it can be hand sewn if you have infinite patience!)
Other info
For this bag, I used 2 complementary colours/patterns of fat quarters.
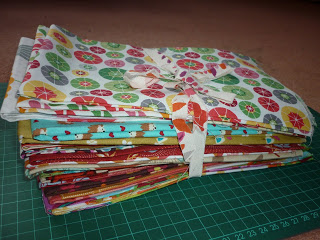
My book shell was 38 cm by 24 cm, with a spine width of 7.5cm.
The details of making this bag are specific to these measurements: for other bags you’ll probably have to tweak things.
I’m not a seamstress, nobody’s taught me how to do any of this stuff: I made this up as I went along, so I may be doing things the “wrong” way, but it’s the only way I know how to do them!
Instructions
You’ll need to make a template for your fabric end sections, so take your A4 card, and cut a triangular shape about 5cm, by 18 cm, by 21cm. Also cut a rectangular shape about 4cm by 25cm.

Make sure your book has as much of the glue/thread attachments removed as possible from the spine, including sewn-in fabric bookmarks. You will be gluing the felt to this surface, soyou want it clear, to allow it to be glued securely. Cut threads if present, and pull off any remnants of paper.


Use the card template to mark the wrong side of your selected fabric: you will need to do 4 triangles (for the bag ends), and 2 rectangles (for the closure tab).
Remember to leave about 1cm extra around each template, for the seam.
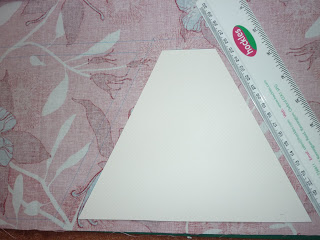
To save material, mark out the pieces close together, if possible.

Cut out along marked lines.
Bag ends
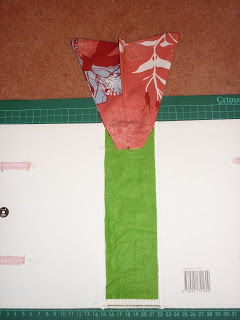
Place triangular pieces together, with wrong sides facing out. Pin into place along ink marks, then sew together, leaving smallest edge open.
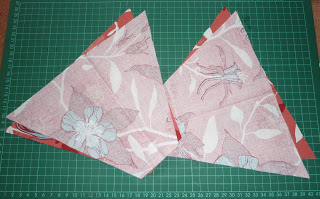
Turn end sections right way out by pulling through the open end. Tweezers can help here, to grab the material, and straighten out the corners.
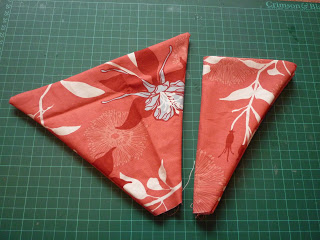
Fold end pieces in half and iron flat. Mark a line in pencil running 2cms in from the folded point, to 10 cms down. Sew along the line – this should help the material to fold inwards when the bag is shut.
Iron the sections around the seam flat again.

Lining
Lay book shell on your lining fabric, draw around the shell, and cut out, including about 1cm extra for seams.
Iron the seams flat rather than pinning them.

Sew along seam on sewing machine.
Closure tab
Take the 2 rectangular pieces for the closure tab.
Now, I’ve done attaching the magnetic snaps to the closure tab both before it’s sewn together, and after, and trust me: it’s far easier to do it before it’s sewn together.
Lay the thin back part of the snap onto the fabric, about 3cm in from the end. Ink mark the areas where the legs will come through using the back as a template, and cut slits where marked.

Slide the snap legs through the material and the thin back part, and bend them flat.

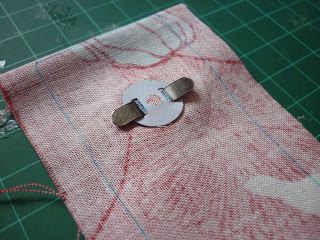
Snip off the excess length of legs that stick out beyond the back of the snap.

Pin the tab together along the seam, and sew, leaving one short end open.
Turn right side out (again, tweezers can help here), and cut a length of felt that will fit inside the tab. Use the tweezers to push the felt inside the tab – this will help stiffen it up.
Book shell
Use the thin back part of the other half of the magnetic snap as a template on the front cover of the book to ink where to cut. I tend to place them 2/3 cm’s down from the edge.
Cut through the shell where you’ve ink marked on the front. Push the magnetic clasp through, and secure at the back as you did with the closure tab. As the book shell is quite substantial, you won’t need to trim any extra leg length on the edges of the snap.
Glue a strip of felt the width and length of the spine onto the spine.
Lay the handbag handles onto the shell, and measure the middle. Use the holes in the handle bases as a template to ink mark where the ribbon should be attached to the bag – I usually put them about 2cm down from the edge.

Cut through the book shell using a craft knife to create slits for the ribbon that the handles will be attached to.

Putting together
Push approx 10cm lengths of ribbon through the slits in the book cover. Glue one length of the ribbon down, feed through the handbag handle, and glue on top of already glued down length.

Repeat for both handles.
Glue both fabric end sections to the spine felt, with the angled seams pointed inwards. Start with the open, narrow end: glue onto the felt, pressing down to ensure close contact.
Repeat with other end section.
Section by section, glue the two matching sides of the end panels to the book shell. This can be tricky at the beginning point, when you’re persuading the materials to fold in a different direction from the one it’s been glued down in, hence doing it in sections.

After deciding how wide a closure you want for the bag, glue the closure tab to the book shell with the appropriate length hanging over the book shell edge.

Have a short break to swear at your glue gun, when the rubber nozzle falls off while you’re in the middle of a complex glue-based manoeuvre….

Lay the lining on top of the pieces attached so far, and check where the lining overlaps. Start gluing the lining onto the bag, starting on the same side as the already-attached end panels.

Glue the lining on, down to the spine.
Attach the other side of the end panels.
Glue the lining on over the edges of the side panels, and to the end of the book shell.
Ta-dah: one book bag!

Now, collapse in exhaustion, nursing the hot glue burns, and craft knife cuts you’ve picked up along the way.
Excuse me, I have a handbag to package up and send abroad….
